Showing posts with label DIY. Show all posts

Friday, March 15, 2013

Lately

Lately life has a little on the crazy side/not super busy.  Adjusting to life on a mountain has not necessarily been as easy as I thought.  Add in moving to a new city, Matt and I sharing 1 car, and a much much smaller house (850 square ft to be exact) and you've got some major transitions.  We don't live close to anything...and I mean anything! Can you believe the closest Target is 45 min away?!?!?  Can you even imagine?  Suffice it to say, it's been an adjustment from living in Atlanta.   

All that to say, we are starting to enjoy ourselves a little now!  Here's what's been going on around here!

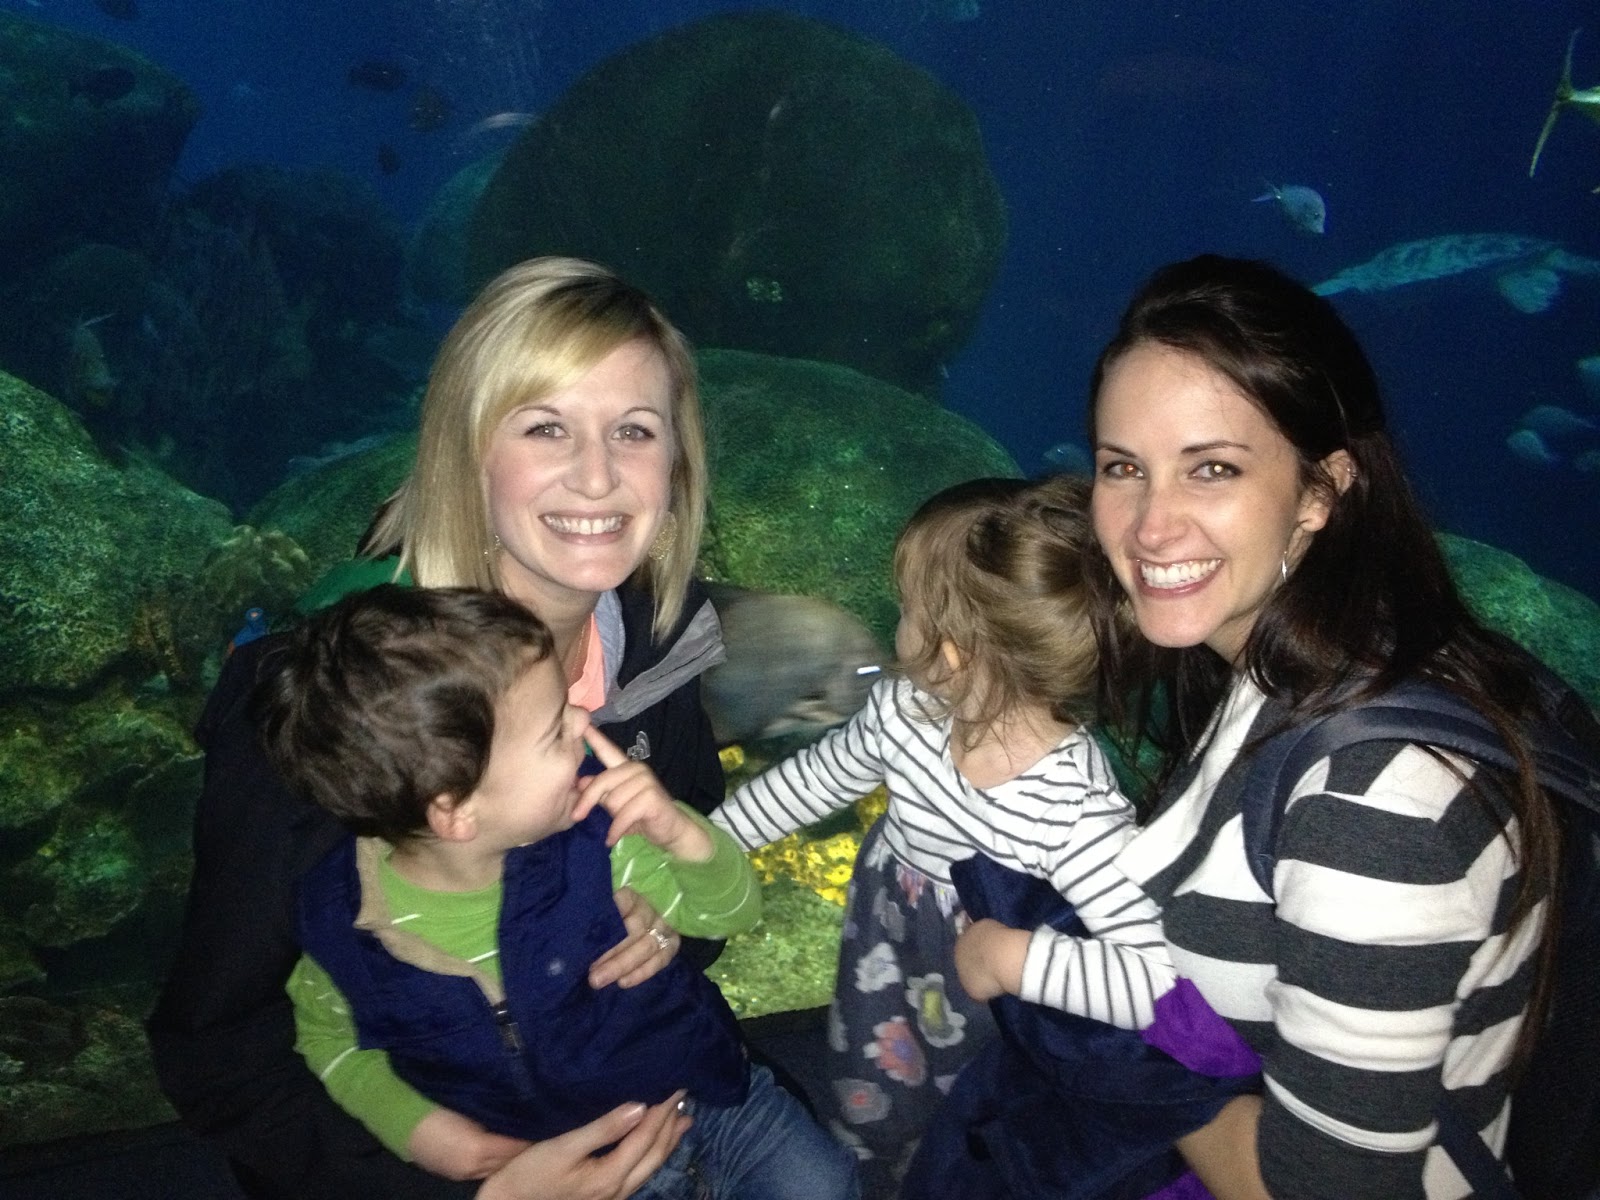
We got a membership to the TN aquarium for Smith's bday gift.  It has paid for itself over and over and over.  He LOVES it!!


Gigi and Big Daddy came to visit and took us on the incline railway.  It goes straight up the mountain.  Smith loved it and LOVED seeing his grandparents.


A few weeks later a few of Smith's cousins came to visit!  His cousin Alli shares the same bday so we celebrated by having lunch and cupcakes at home then headed to the aquarium!

Cupcakes! My first attempt at making my own frosting and it worked! I'm not great in the kitchen, but trying to get better.  I also bought my first set of frosting tips, which makes icing cupcakes much easier (I know, I'm the last person on the planet. oh well!)


Party favors!


At the aquarium.  I love my nephews face right here.  Seriously one of the cutest kids ever.


I sure hope these 2 are best friends as they grow up.


Amazed at the stingrays.  


This was Smith's actual bday.  Matt leaves pretty early in the mornings so we got Smith up early so he could see daddy and have bfast with him.  


Birthday chocolate chip muffins.  He has started picking out the "special treats" and eating them.  This boy cracks me up.


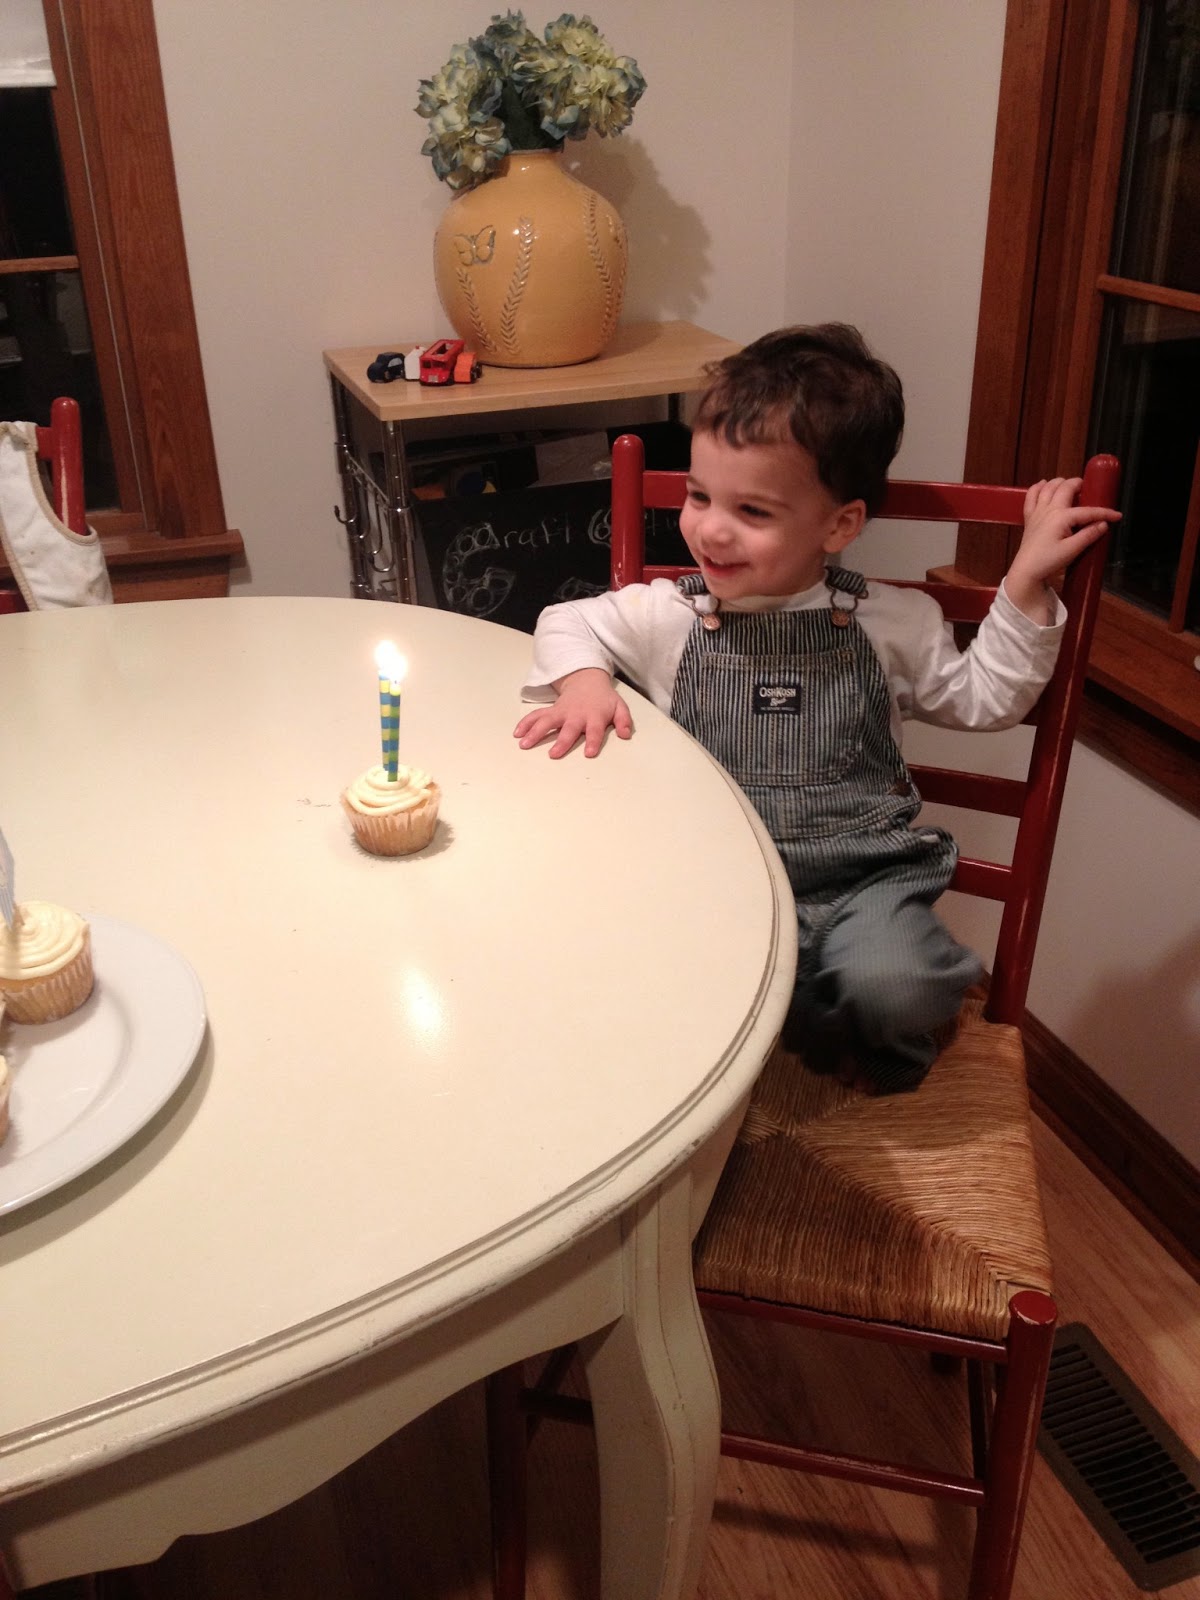
Blowing out candles! He asked to blow out candles for days after this...so we did :)


Some friends came to stay with us for Smith's bday weekend!  Addy and Smith after bathtime.


At the aquarium...again :)


Dads and kids with the stingrays.  


The next weekend more friends!!  Katie and Jack Allen.  Derrick and Lucy stayed home this time, but we hope to see them soon.  We went down the mountain to the aquarium again and it started snowing!  The boys loved it!


Footie pajamas are just too cute!


Then we celebrated Vday.  My mom always made holidays so so special so I am trying.  It's actually not easy for me and I seriously lucked out that Wal-mart had some stuff in the .97 cent isle.  


And lastly Smith has been sick several times this winter.  Seriously NO fun.  Check out those arms and that face!  


I've started sewing again and have a few reupholstery projects I'm starting, which means I'm feeling settled and back to normal :)


I just added this set of pillows to my Etsy shop.

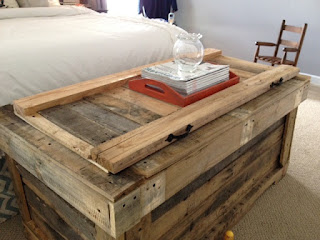
And I just 2 of these chairs from my grandmother.  I LOVE them.  They are going at our kitchen table.


This is the fabric I'm using to reupholster.  Can't wait!


Anyway, that's what's been going on around here.  Hope everyone is doing well!

Wednesday, September 5, 2012

How to make double welt cording

This past weekend was not our usual labor day, but it was actually nice because Smith and I have colds.  This is my 3rd cold in 6 weeks so it's kind of a bummer.  I think it's just the start of school and MR.P being in the schools again for work.  

Anyway, with being home a bit more this weekend I was finally able to finish the chair I'm  redoing.  The most intimidating part was learning how to make my own double welt cording.  But I overcame my fears and I did it!!!  So I thought I would post a tutorial on how you can make your own too when you tackle your first reupholstery! 

First, pick an amazing fabric that you are going to fall in love with every single time you walk past your chair.  I chose this navy and white striped fabric from ikea.  I used the navy stripes for my cording.  Then I purchased single cording from hobby lobby using my 40% off coupon.  Since I didn't know how many yards to get I just bought the whole spool :)

Now for the good stuff.  I cut my fabric into strips about 4 inches wide.  Then I sewed them together with pretty side facing each other.


Then I cut off the excess fabric.


Then turn your fabric over and put your single cording into the very center of your fabric.  Like this...


Then, using your zipper foot sew straight down the side of your cording.  I pinned mine on my stripe to make sure I stayed in the center.   A quick tip.  I went very slowly so that I could make sure the stitch was VERY tight.


This is how it should look when you're done (well, with the first part).


Then you stick the other cording into your fabric...


Then fold it UNDER your other piece and pin it down.  


Then put it in with the pointy part of the pin first so you can sew right over the pin.  Oh and switch back to your regular foot.  Now sew straight down the middle.


Then cut the excess fabric off and you get this!  Obviously this is the back of the cording.  You want to cut off as much as you possibly can so it won't show when you glue it on.


And THIS is how it turned out!


I'd say it's totally worth it to make your own.

And here is the chair all finished.


It seemed like a really daunting task, but once I got into it, it really wasn't that bad.  I'm so pleased with it!

Let me know if you try this...and if you do, send pics and I'll post!

Wednesday, August 22, 2012

Melissa Button Frye Boots Look alike

It has been a really really long time since I posted any potty pics.   If you all know me, you know I love a good deal so I thought I'd share.  

I really really like the Melissa Button Frye Boots, but $330 isn't in the budget for boots :)  So I started searching for the next best thing.  No one seemed to have just the simple boots that I wanted.  I don't like a lot of heal or frills or anything.  So I almost gave up.  One day I just searched for some look alikes and I found them!!  And guess who came through with them?  TARGET!!!!  They are $70 and I'd say that's a steal compared to $330.  


Pardon my outfit...Boots and shorts aren't my thing.  I was just excited that they had finally come in the mail!  (If boots and shorts are your thing, I'm impressed.  I'm just not that cool.)


I like them even more than I thought I would.  They are the perfect color and they fit great!  I hate to say it, but now I can't wait for fall!!  I've been trying to stay away from wishing the summer weather away, but oh well!


I usually wear a 7-7.5.  I ordered a 7 and they are perfect.  

So there you go...a perfect look alike :)

I thought I'd give a few little updates as well.  This chair is going in the Market as soon as I'm done with the new upholstery.


Here's it's current status :)


Stripes make me happy!  

And here is a little something MR.P made for our 5 year anniversary!


I cannot even begin to express how much it meant to me that he MADE this for ME!  Seriously sweet husband :)  I love it!  


It's at the foot of our bed and it's perfect.  Be on the lookout for a special blog post from MR.P.  If you missed his first one it was a hoot.  

Here's the other side of the room, just for perspective :)


This is a special chair.  It's my grandparent's old chair and I absolutely love it. I had plans to recover it, but once I put it in our room I realized how much I liked the fabric.  It goes with our room soo well without being too matchy matchy (my biggest fear, yet what I accidentally do all the time).  

So there you have it.  All in a days work around here!

Oh and don't forget to enter the giveaway here!

Saturday, August 18, 2012

How to make a slipcover - Part 3

So last time I left you with the chair halfway covered.  Sorry about that.  It's been a slow process.  But we are almost done.  We pinned everything together and sewed it all together.  It was definitely not easy and of course I accidentally deleted the pictures from my phone.  Boo.  

Oh well. I eventually got up the nerve to sew the cushions.  They turned out pretty well and I learned a ton in the process.  Here is how they turned out.


They aren't perfect.  The only part I really messed up on is the front cushion...of course.  The fabric doesn't match up on the top left side, but it's ok.  I might be able to fix it.

The next process was making the skirt.  At first I wanted to do a ruffle skirt.  I didn't buy enough fabric for that though, so we went with a straight skirt.  My mom sweetly made the skirt though.  I stapled in on though and am really pleased!  The chair is ALMOST done.  All we need to do is hem the actual slipcover, which is no small task.  Mainly because that means we have to take it off the chair.  Oh well. It will get done.  So this is how the chair stands now.  

This is a great slipcover though.  I am not constantly fixing it because the chair and cushions are separate.  With this being a chair used quite often I'd say it's turning out a success!  Praise the Lord :)


Wednesday, August 15, 2012

Awesome and amazing chairs

Can I just start out by saying that I LOVE free furniture?  Yeah, it pretty much makes my day when I see a friend post about free furniture if we can pick it up :)  Anyway, a few weeks ago some friends posted that these chairs were free game if someone could pick them up.


I was "sold" immediately.  I love the shape and tufting.  One day I will recover these, but I went with the free option for right now.  My friend Joy gave me some slipcovers for some wingback chairs.  I slipped those suckers on and this is what I got.


Not great, but thought maybe it looked really shabby chic? Maybe it looks like I don't care, but totally great still?  Nah, not so much.  My friend Katie came over and we turned the slipcovers inside out and started pinning everything a little tighter then sewed everything up.


Once we sewed everything up we cut off all the excess fabric.  And this is how it turned out!


They are soo much better!  And here's the back.  (Love the two little people running in the background)


We are enjoying the new chairs so much! (please pardon the mess) Thankful for these chairs!  One day I'll learn how to upholster this type of chair and they will look amazing. But they definitely work for now!  

We've done a ton of changes to our house lately.  I hope to share those very soon!

Thursday, June 14, 2012

Risky - Taking my Cabinet Doors Off

Happy Thursday morning! I am baby sitting one of the sweetest little boys today.  But while he naps, I thought I would show y'all my latest project!  

I was reading my Better Homes & Gardens magazine and I came across this kitchen makeover.


It's just so simple.  So I decided to take off my cabinet doors.  I've wanted to do this for a while, but didn't have the guts until I saw this.  Paint! Of course painting the inside is the cheapest/easiest way to get the job done.  

So I did it!

Here's the BEFORE:


Ok, so I got excited and had already taken off one of the doors.  Oh well.  


I did a little organizing to see if it would look good.  Then a few weeks later I went to town on painting the inside :)  Yeah, I got bored.


At this point I was thinking I think this might actually work.  But painting inside here was actually tough.  I couldn't sand down the cabinets because they are fake wood.  So with every stroke some paint would come back off.  Ugh.  


The other side.  

I started to realize that putting plates and such back and forth was going to scratch every single time.  That was not going to do.  I thought of putting contact paper down. Then MR.P took it one step further and thought of cork board!  We found this cork contact paper here.  I think it was a brilliant solution since it gives a bit.

And here's the AFTER:


Sorry the quality isn't great.  But I'm no professional photographer.


I think I like the outcome.  I'd like to make a roman shade for the kitchen window. I said I was going to do this years ago and I chickened out and made cafe drapes.  But now they take up too much visual space and my eyes couldn't handle it.  So I'll have to try the roman shade tutorials I've seen all over the internet.  And for the counter tops the plan is still to do butcher block. Can't wait!

Oh and a little update.  This past weekend we had some excitement.  Smith fell and bumped his head.  We had to rush to Urgent Care.  I knew it was coming since Smith is so active, but we were not prepared.  Matt had the car WITH the carseat and I can't drive his truck...one because it's a stick shift and two because it won't start at the moment.  So I stayed as calm as I could. Called my neighbor and she and her husband ran over as fast as possible.  Then called my friend and she brought over her extra carseat.  Oh and I had just taken a shower and my hair was wet with no make-up on.  Anyway, we were there in no time and then MR.P met us there.  By this time Smith was happy again and acting like it was no big deal.


Such a tough little man.


The snacks didn't hurt. 


And the after.  


Glad he wasn't hurt more. Not sure I could have handled that on our first trip to Urgent Care. And even though I know this isn't our last trip there I'll say it, I hope he doesn't have to get stitches again!